oChef
— guided cooking
[ summary ]
oChef is a touch projection interface that works as a cooking assistant that helps you prepare your recipe with an intuitive and helpful step by step process. The system allows you to create your profile according to your personal preferences and guides you throughout the cooking process, starting from selecting your recipe until having your meal ready to be served.
overview —
[ create your profile ]
Diet habits, allergies, personal preferences and cooking tools can be personalized when you create your oChef profile.
[ connect any mobile app ]
Your recipe is in a mobile application? Just send the recipe to oChef and cook your favorite meal.
[ cook your meal ]
Real step-by-step videos and clear instructions to guide you through the cooking process.
[ project goal ]
Improve the step-by-step experience when cooking and combine it with an innovative technology that allows users to interact in a fast and easy way while preparing their food.
skip the design process 🡒
research —
[ context ]
The recipe world has changed dramatically due to technological advances having hundreds of mobile applications and websites that explain step by step how to prepare your recipe... but how could we improve that experience?
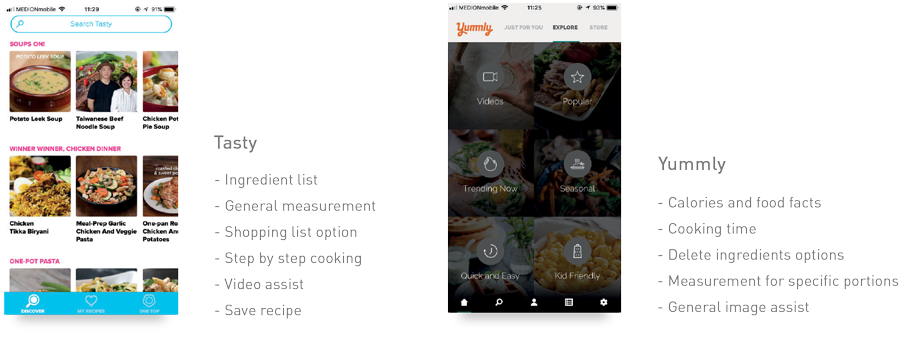
[ market research ]
Taking Tasty and Yummly as a starting point for the project, the analysis of both platforms gave us a clear idea, basic content and several features for a recipe-based cooking system.
[ technology research ]
Our first approach was interactive projection because we had access to a product with this technology. We explored the possibilities and limitations and guided the project towards a functional prototype rather than only a virtual concept.
[ research results ]
The project was not intended to create a new platform, but to work as a tool that could connect to existing applications and focus on the user experience when performing the step-by-step process in a digital and innovative way. The Sony Xperia Projector guided some ground rules applied into the design concepts.
ux research —
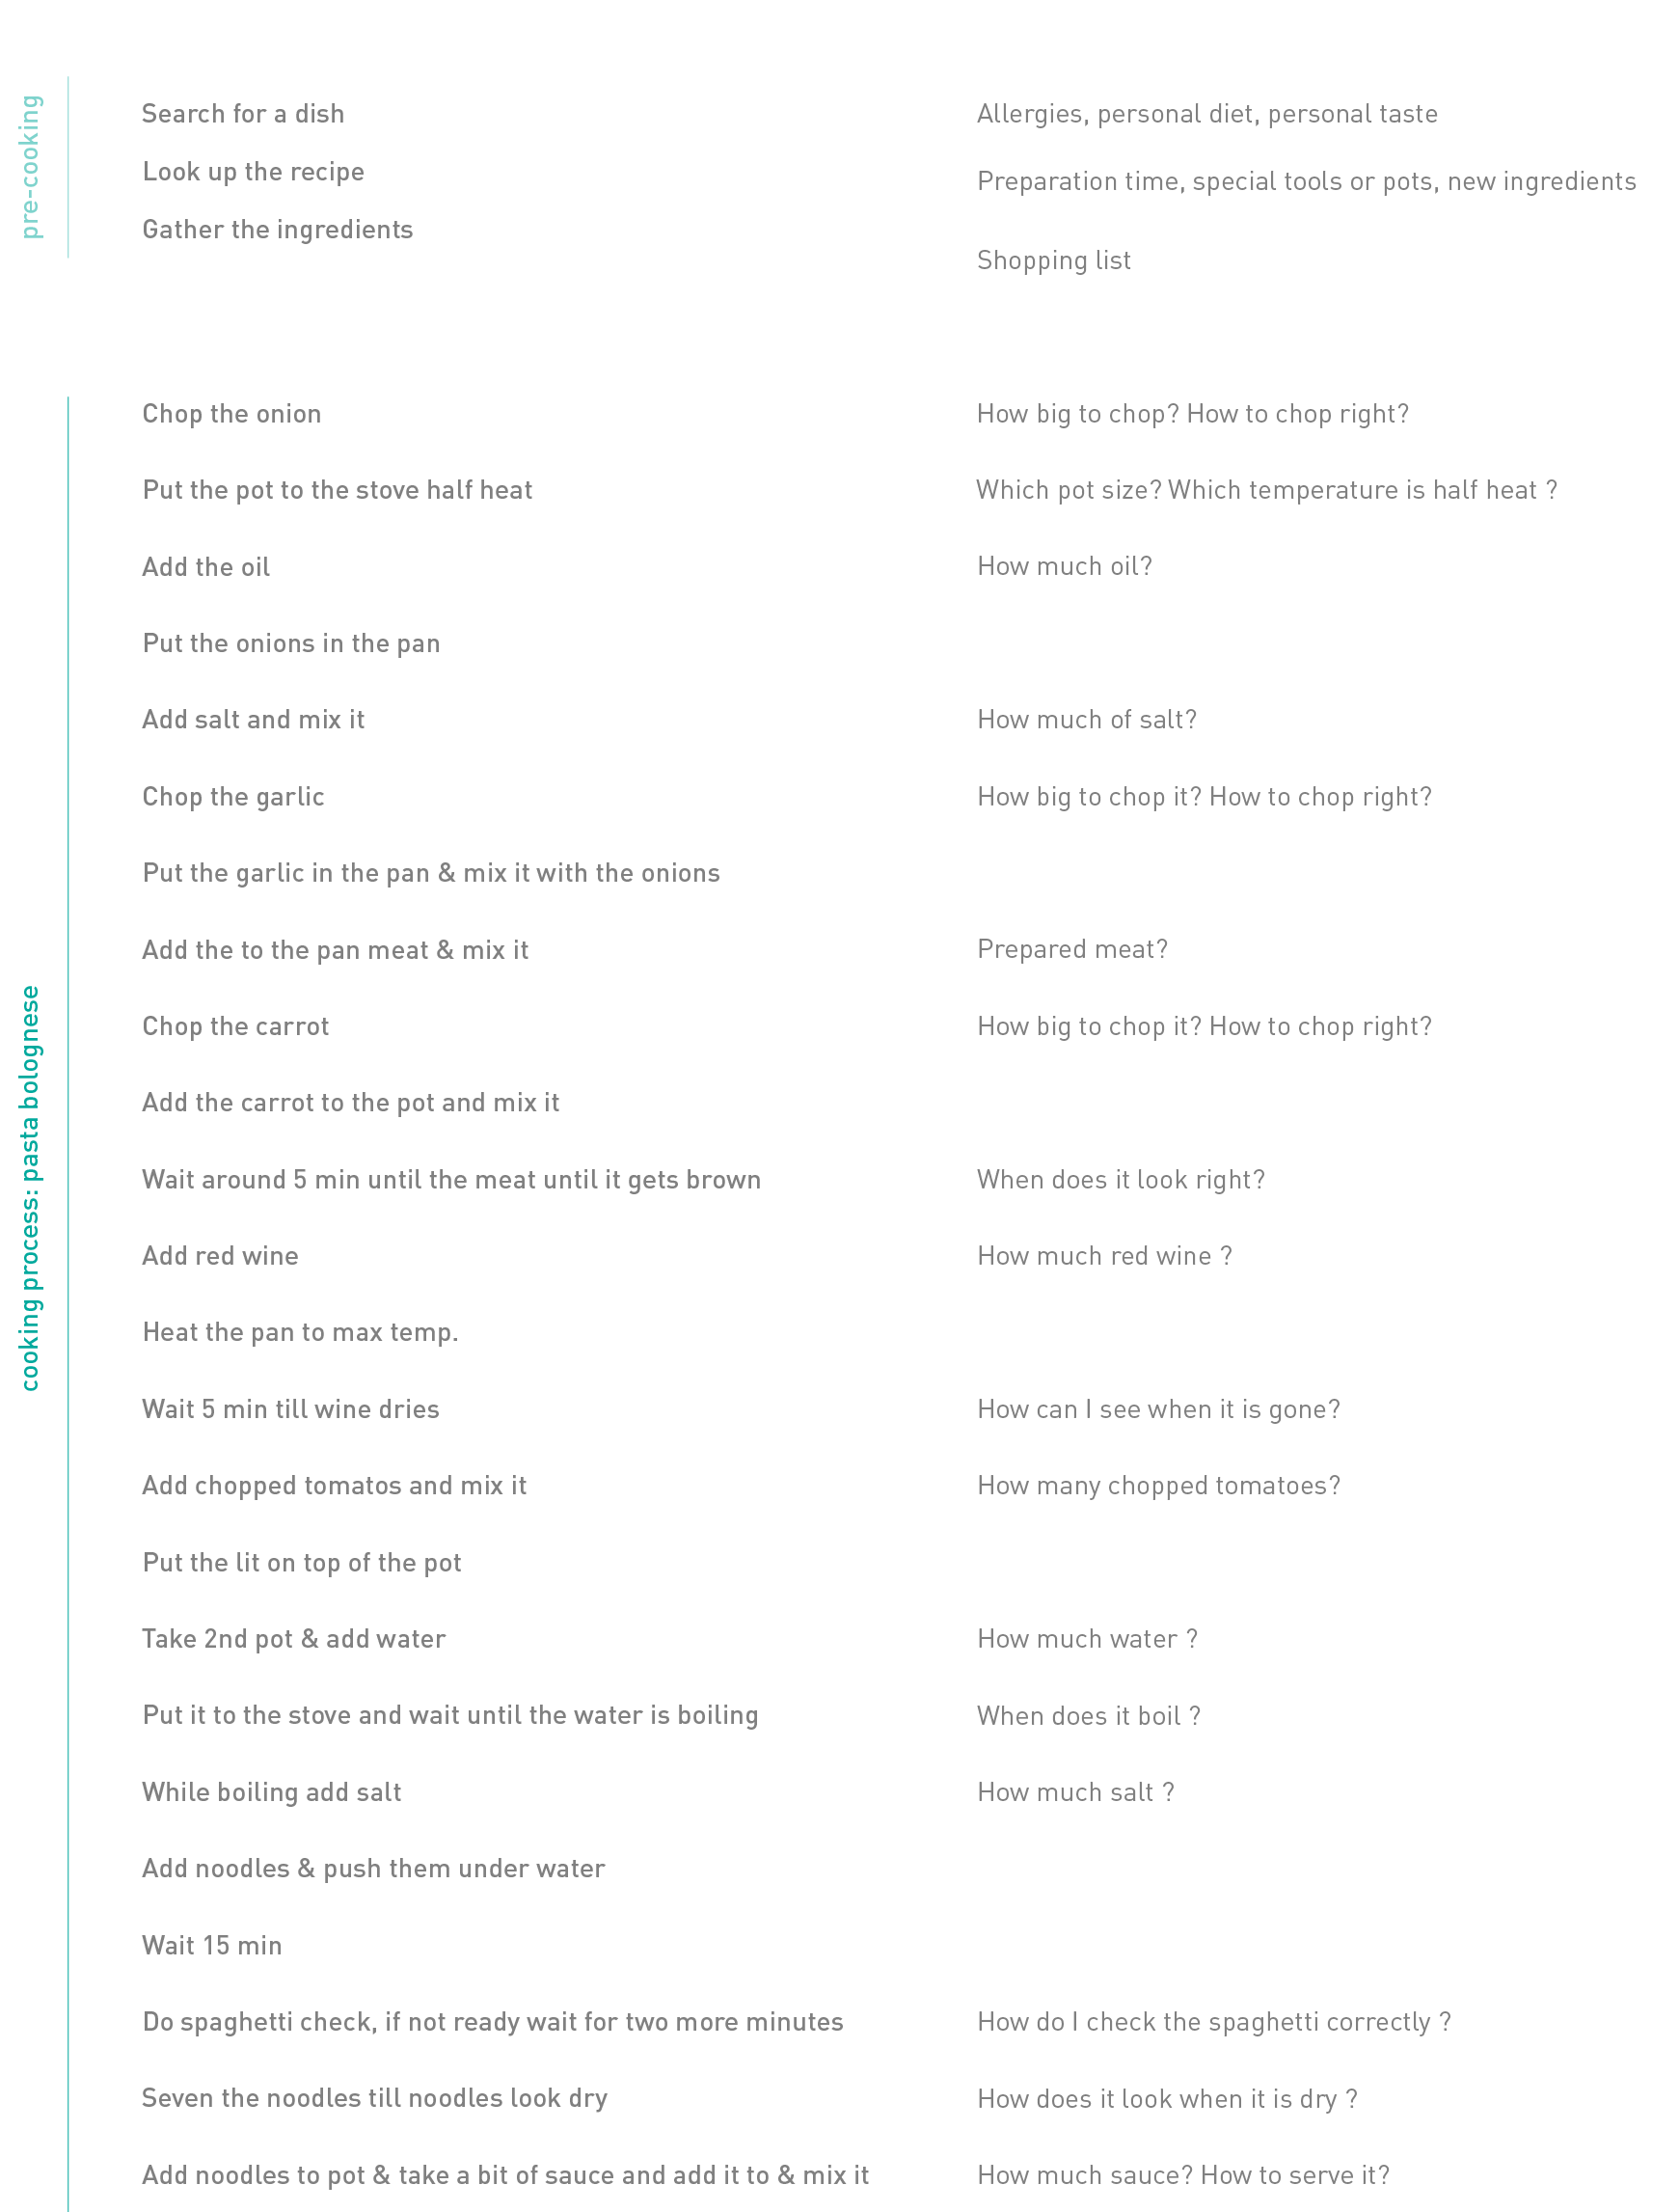
[ cooking scenario ]
To validate the user needs, we went through the cooking process ourselves. The whole process divided in “pre-cooking” (prepare ingredients) and “cooking process” (step-by-step).
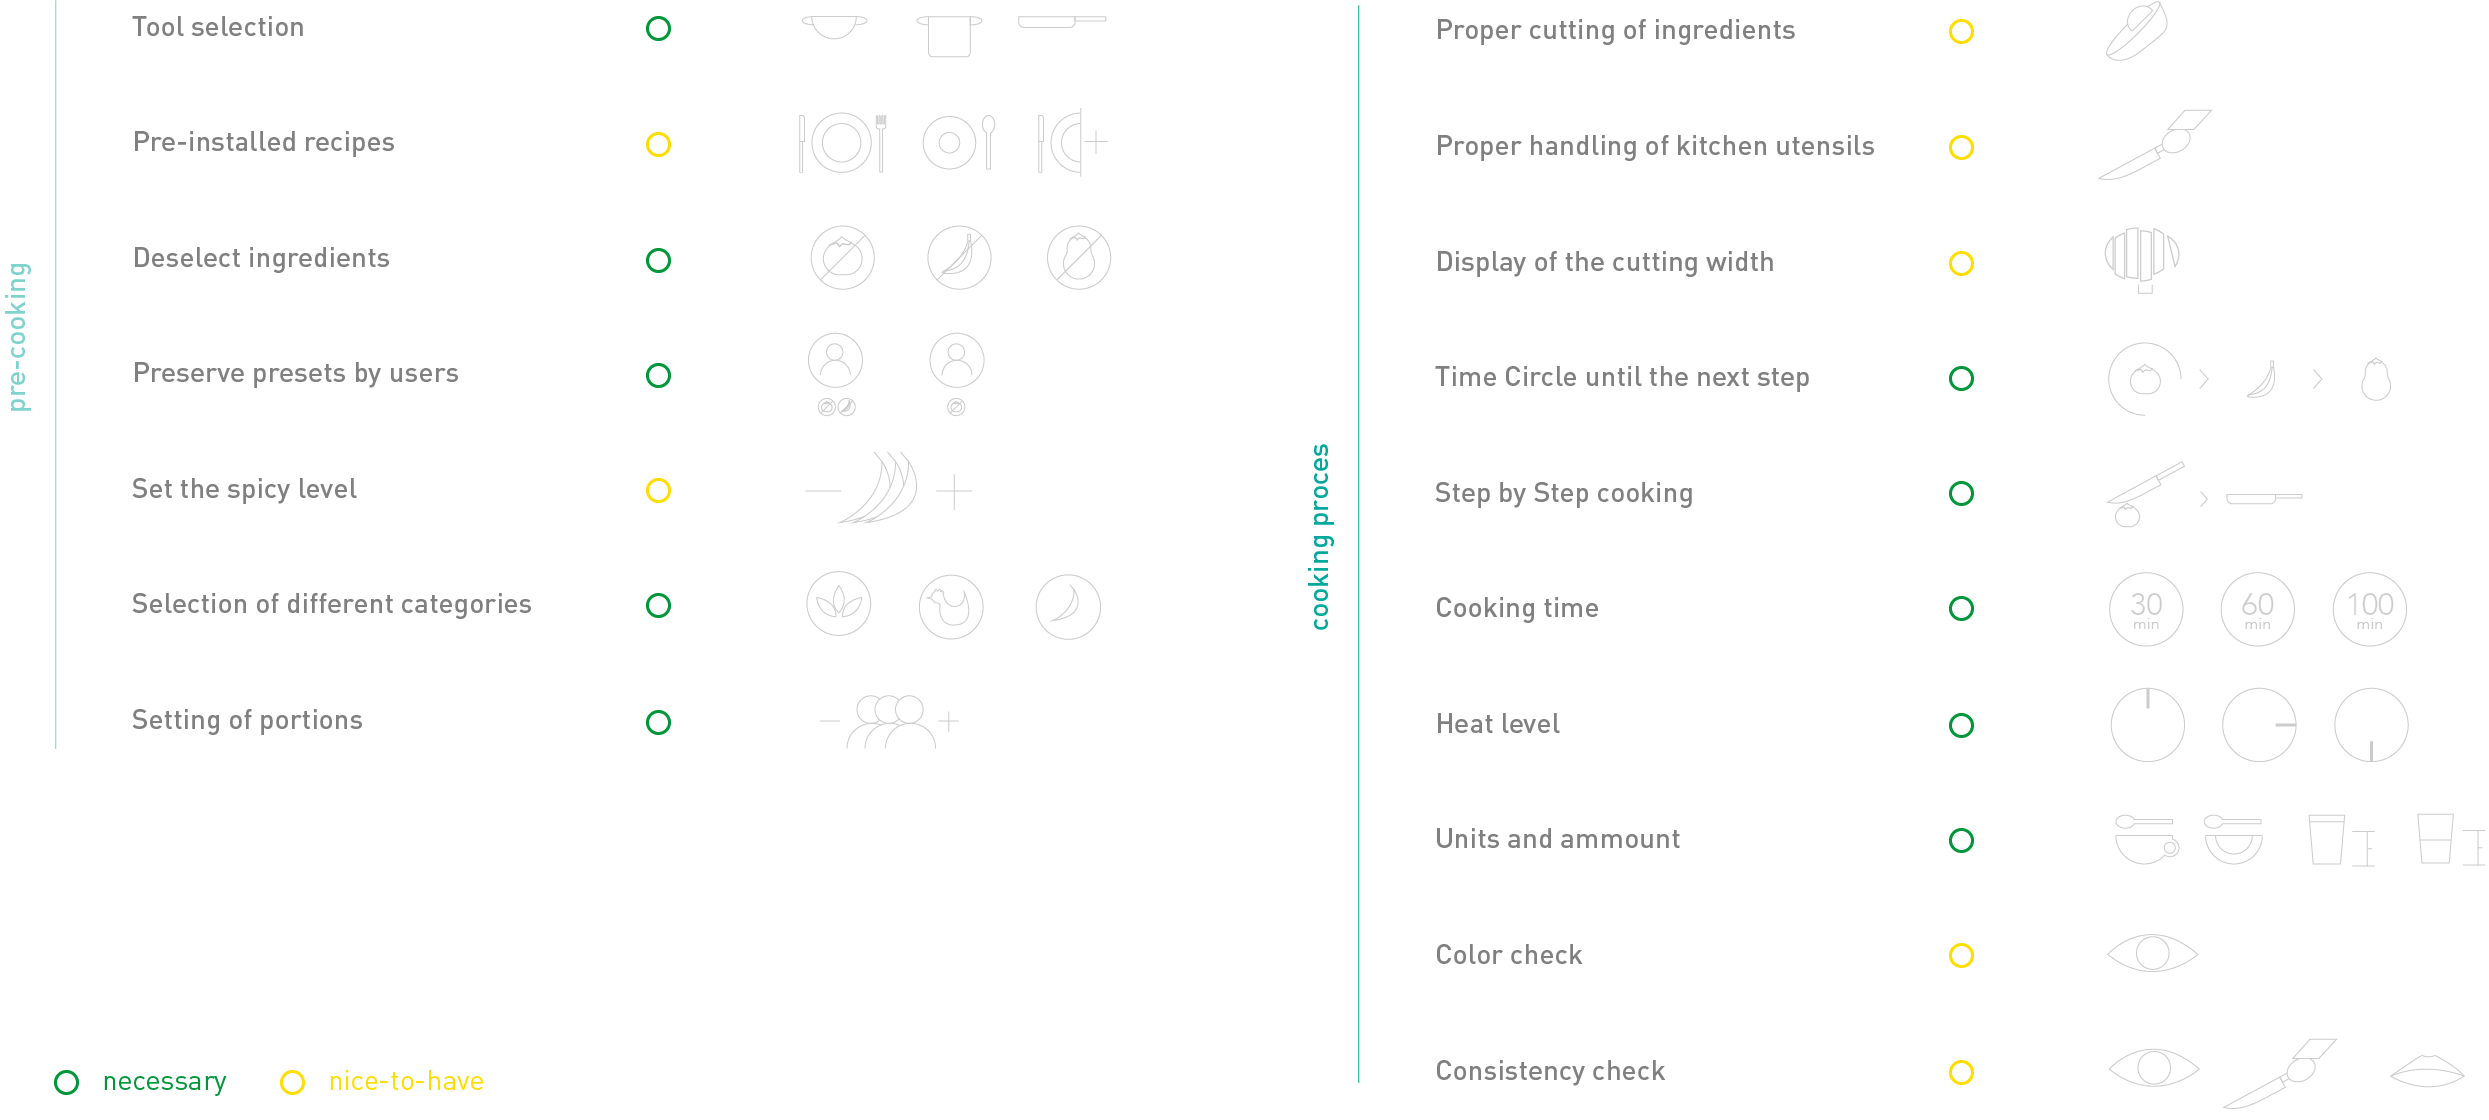
[ features needed ]
We brainstormed features that would improve the user experience and filtered them into necessary vs optional for the system.
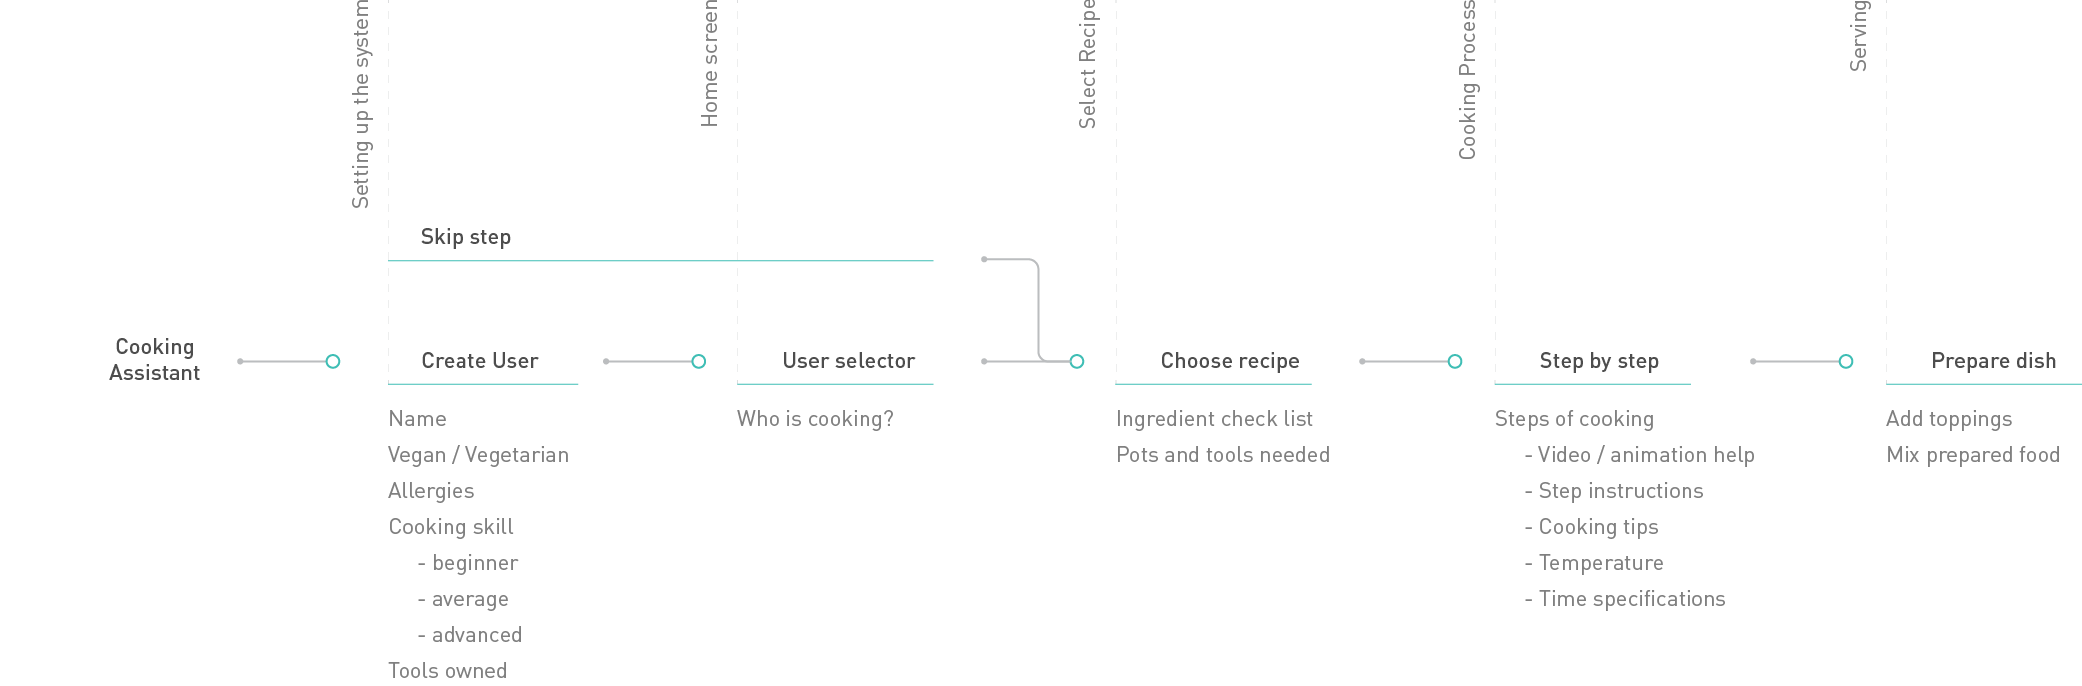
[ information architecture ]
We created the flow for general use cases and validated features with possible users.
[ design iterations ]
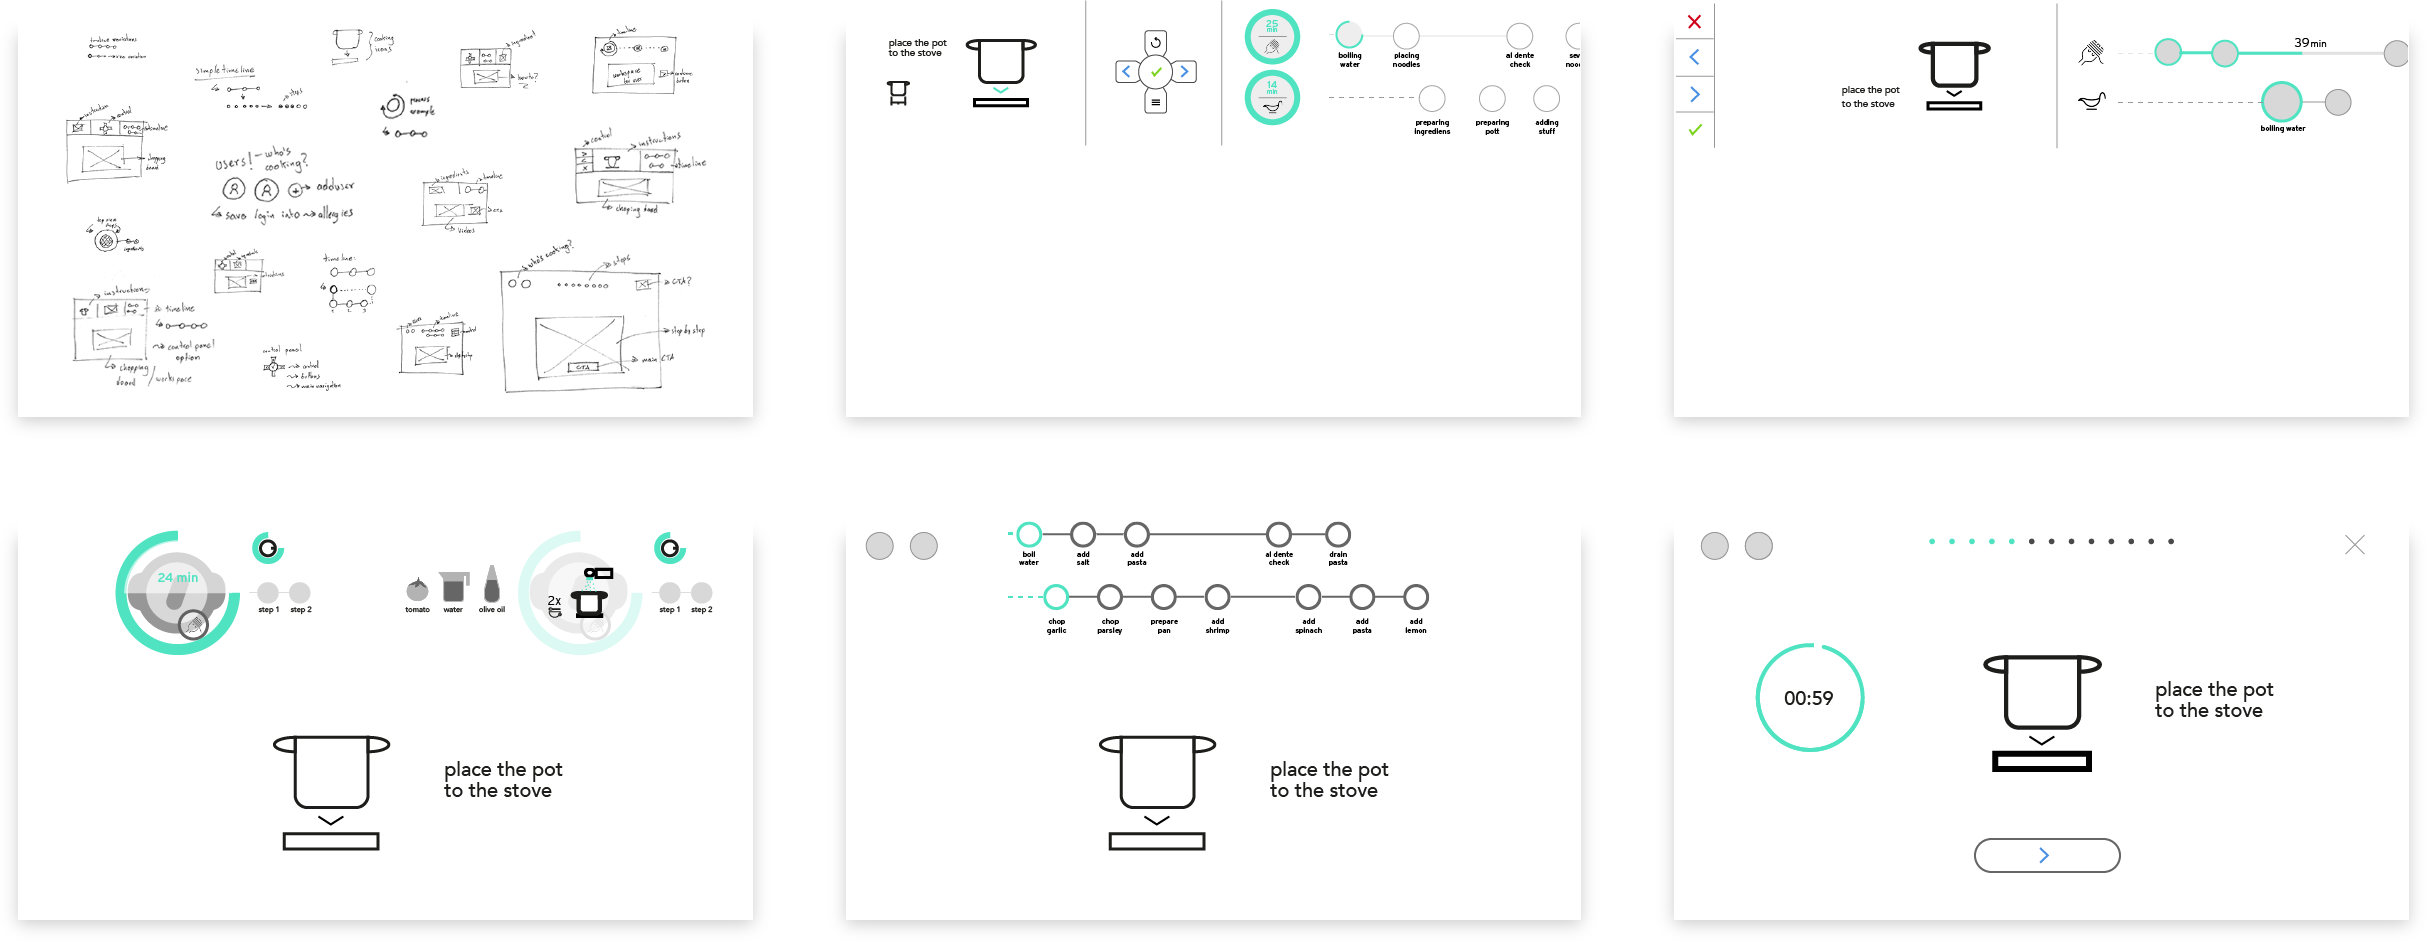
After defining technology, user needs and content, we iterated on interface concepts, starting with paper sketches and moving to digital wireframes.
ideation —
[ wireframes ]
The main challenge was to decide which information was necessary. We placed clear and simple CTAs inside the step-by-step process.
[ visual approach & animations ]
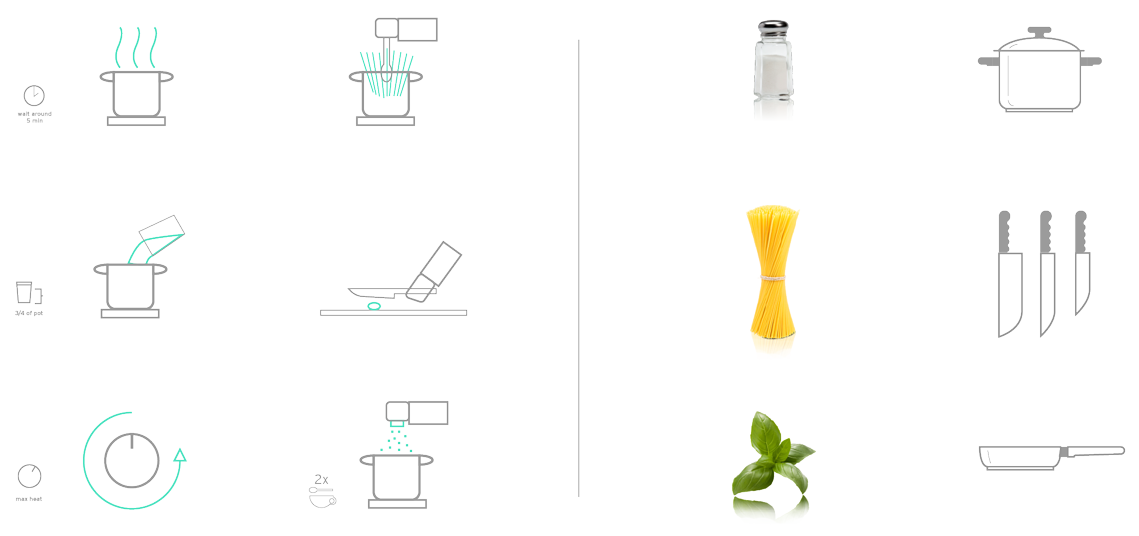
We created a set of animated icons and mixed them with real videos and images to help users get information quickly.
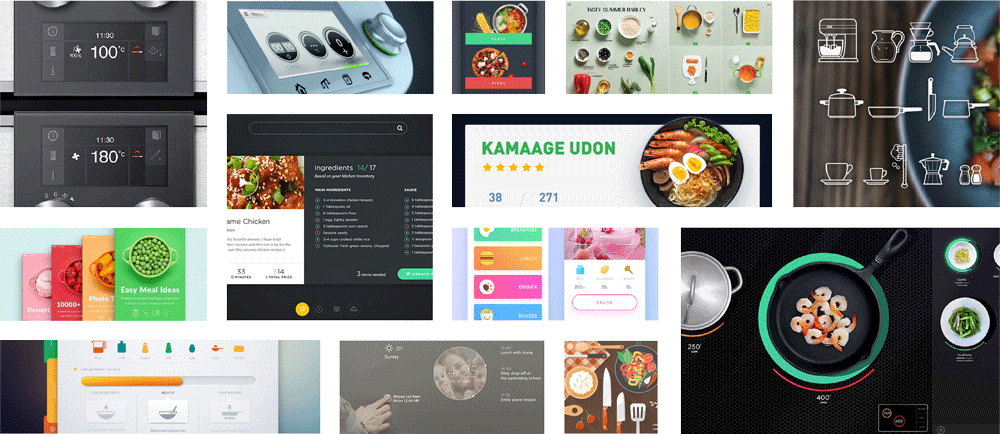
[ interface research ]
Moodboards helped define layout, animation and visual elements for the interface.
[ interface elements ]
Icons, photos and videos were designed and tested on different surfaces and lighting scenarios.
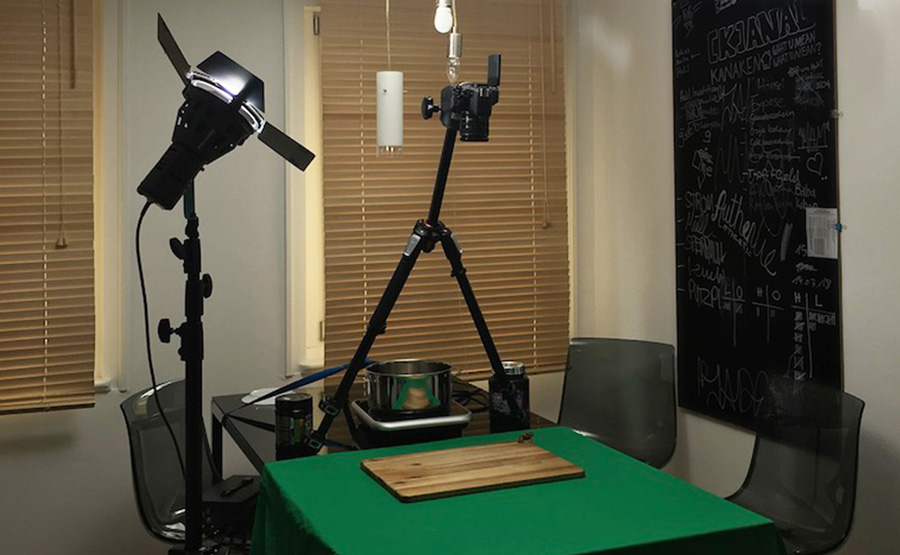
[ cooking videos ]
We recorded top-view step-by-step cooking videos and edited small loops used in the final prototype.
[ final concept validation ]
We tested the concept with target users, developing a functional and visually consistent solution for the projection interface.
final design —
[ overall concept ]
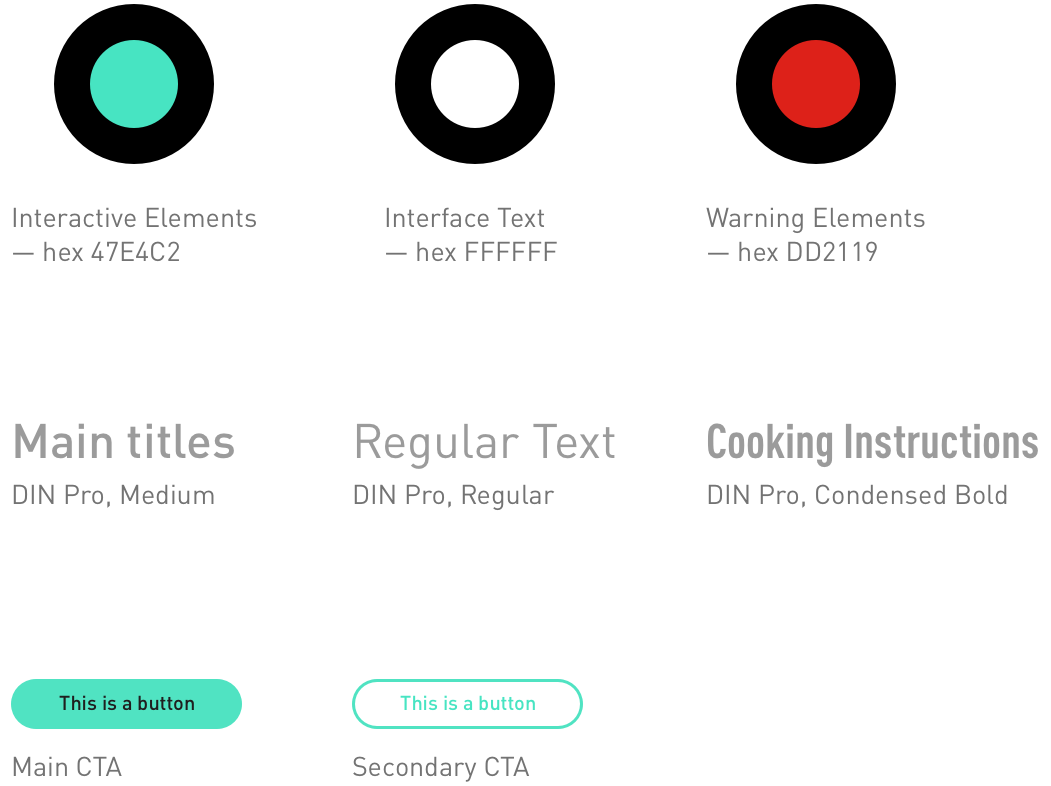
The projection technology defined key visual decisions. Most projectors treat black as absence of light, so we used it as background to create a floating effect. Colors, photos and videos were tested across surfaces and lighting scenarios.

user flow —
[ cooking assistant ]
The final concept has three main features: profile creation, mobile app connection and the cooking process — combined into a cohesive assistant experience.
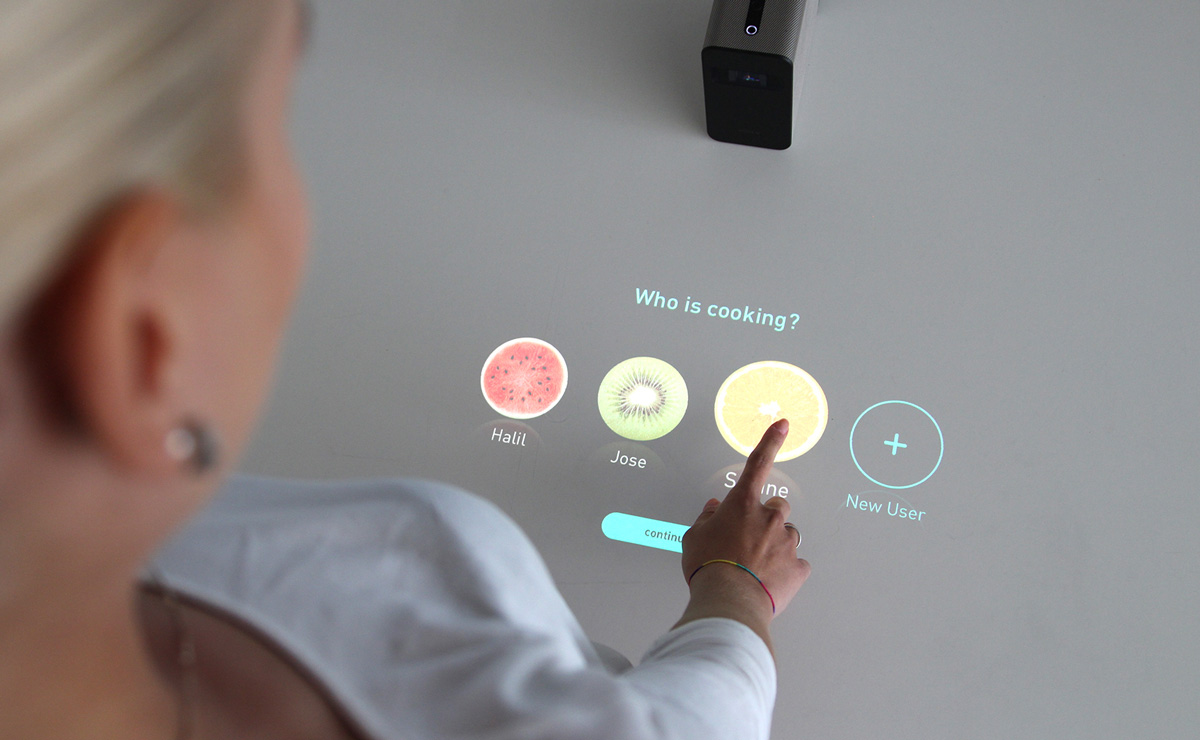
[ profile creation ]
To create a personalized experience, the profile section saves settings for diet habits. Tool selection modifies cooking instructions to match available pots and tools.
— bright light environment
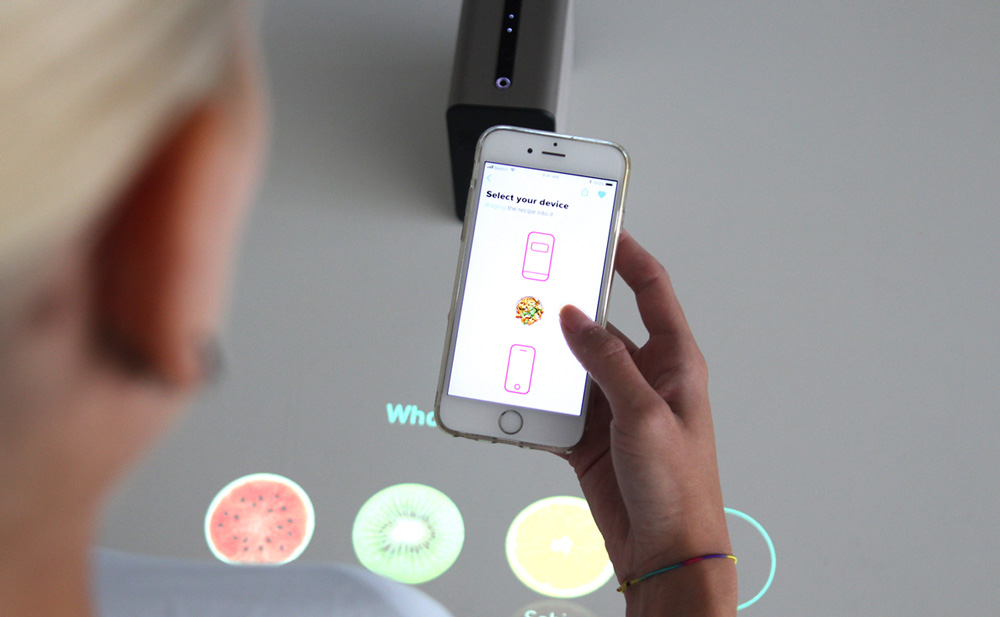
[ mobile app connection ]
The user can select a recipe from an existing app (e.g. Tasty) and send it to oChef. Synchronized recipes produce an ingredient list with warnings for preferences and missing ingredients can be sent back as a shopping list.
— natural light environment
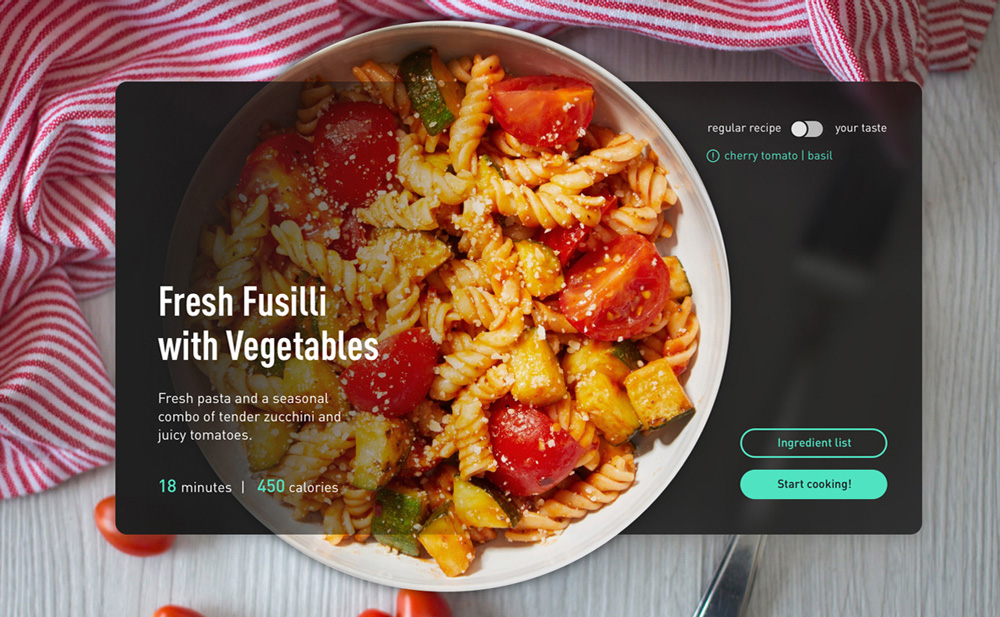
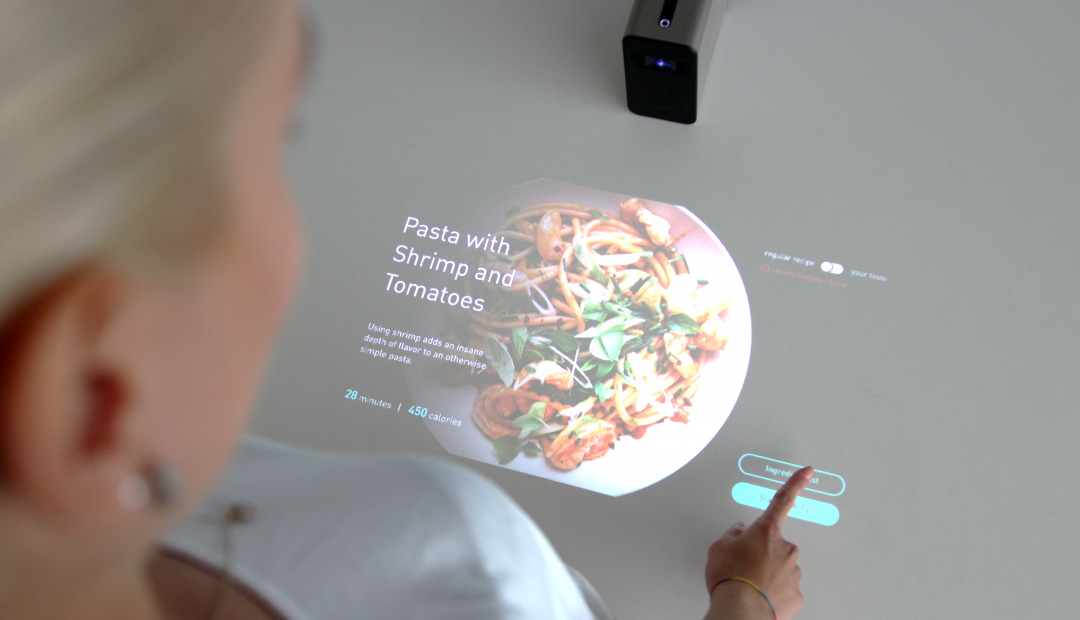
[ cooking process ]
The interface guides users through steps showing progress; users can move forward or back as needed.
— dark environment
[ final thoughts ]
The analysis of the existing platforms and user scenarios gave the project a clear goal and focus while the design iterations allowed us to find colors, contrast and visual sizes for projection that work in both dark and light surfaces.
HfG Schwäbisch Gmünd, Interface Design II — 2018